

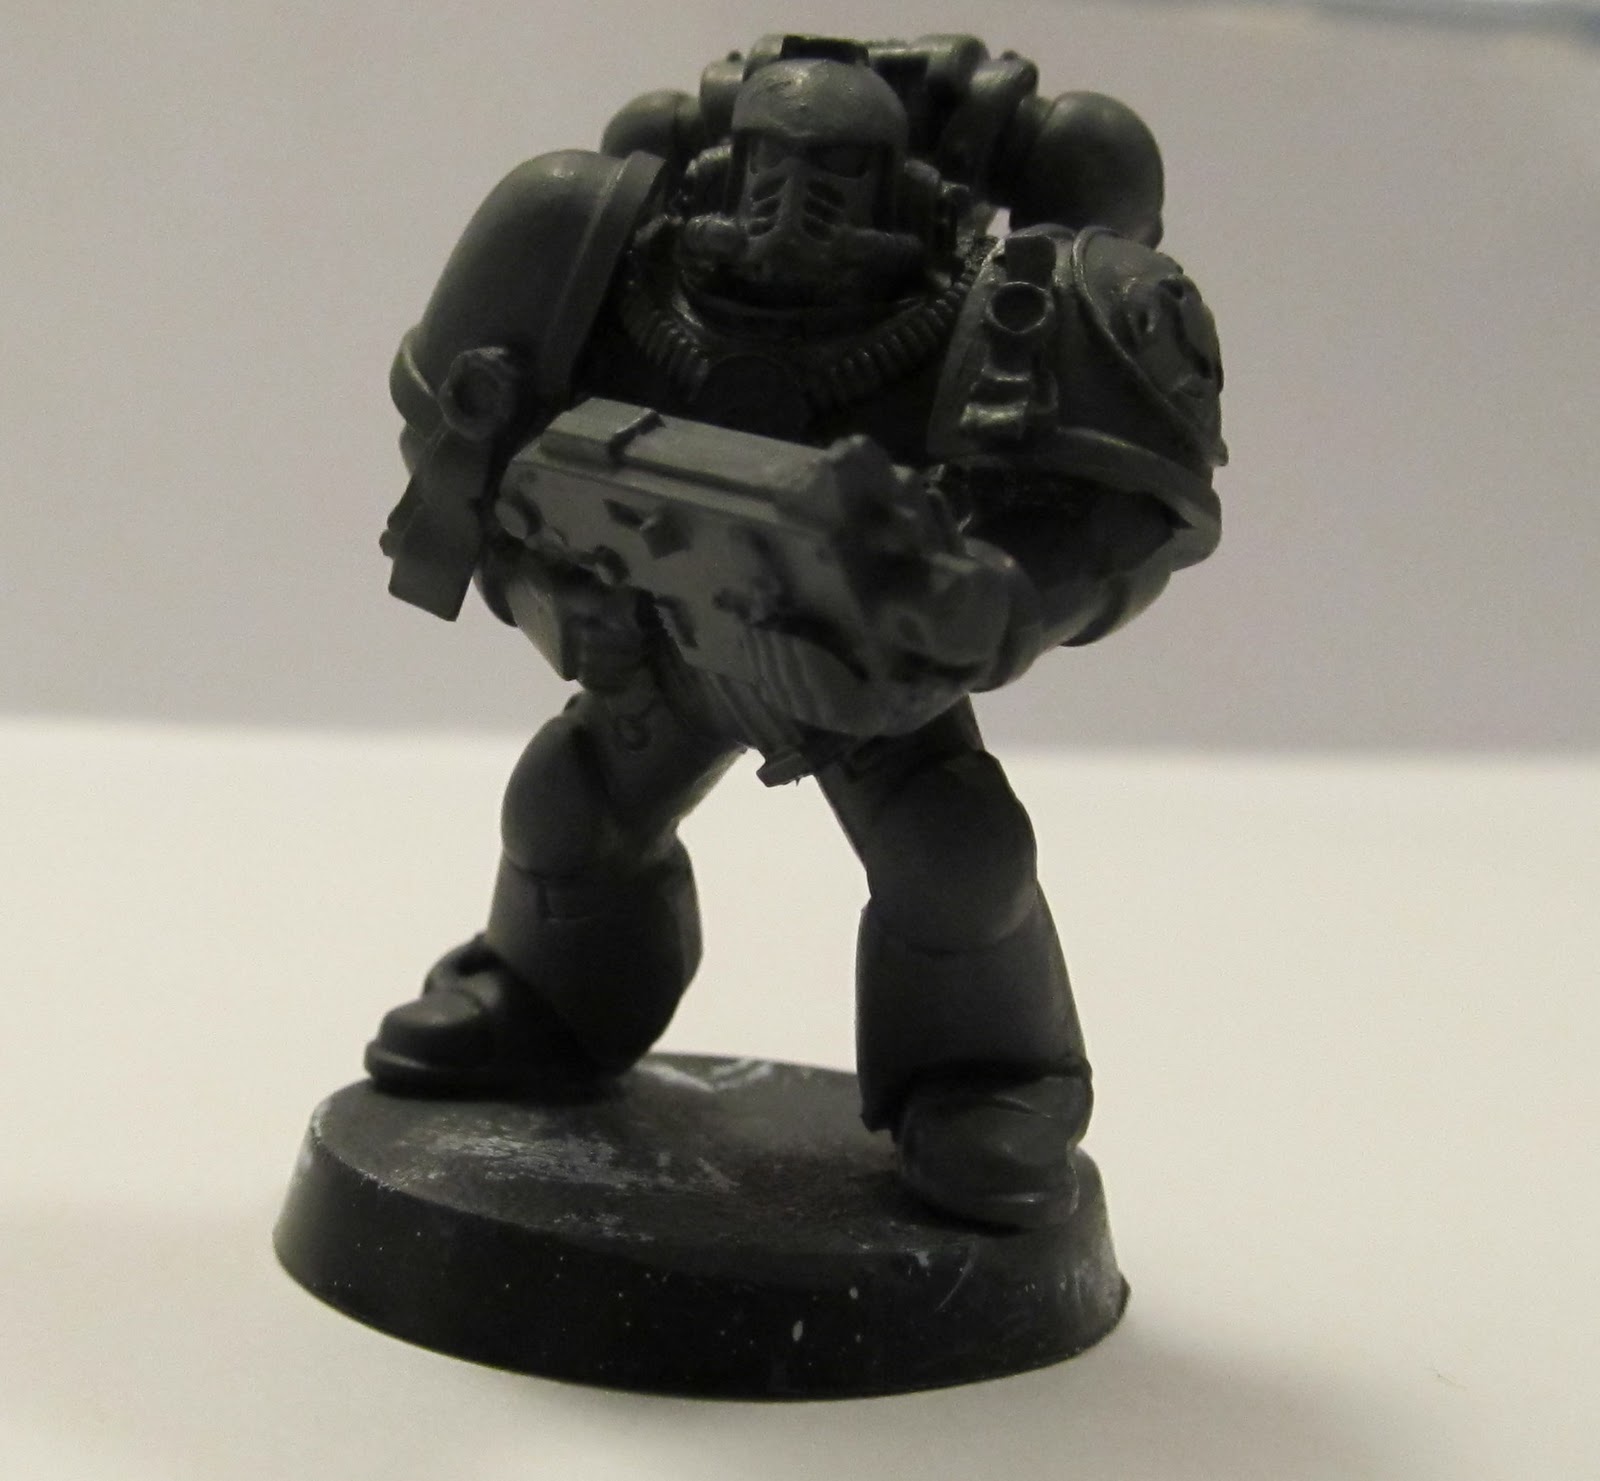
Here is one of my Tactical Marines unpainted and ready to be primed
**When working with the Resin stuff from Forge World its important to wash them with a mild soap and water. Give them a gentle scrub with an old toothbrush and then let em dry. The mold release agent they use on the models will cause you all kinds of problems. If you ignore this and try to prime your models and it doesn't stick.... its the mold release agent thats causing this. Just avoid this mess and take the time to give them a proper bath.

I am a huge fan of paint on primer(or paint on everything for that matter) as there is always that chance for a spray can malfunction that I don't like risking. The great part about painting on your own primer is control. The obvious downside is the time investment. I typically shoot for 1-2 thin coats. I don't feel the need to have a perfectly pearly white prime, just enough to have the base coat stick. I bought an entire case of Vallejo Game Paints so unless noted all my paint colors are the AV Game Series names.

Once the primer is dry I paint on a thin coat of Adeptus Battle Grey (Citadel Foundation). You will have to play with it some, but you should never have to paint on the foundation series at "full strength" to get great coverage. I would rather do 2 thin coats than 1 all covering coat at the risk of losing detail.
**Don't water down your paints so much that they run & pool. This will covers up detail. Just play around with it a bit. If it does pool up don't panic. Just wipe the paint off your brush and paint off the excess paint.
I paint the entire model Battle Grey. I know this isn't ideal, but I like it for two reasons:
1) I find the rest of the colors you paint follow the "tone" of the base coat (especially with thin coats)
and they all tend to blend together in a pleasing way.
2) I assembly line paint and its much easier to paint an entire model than to avoid certain spots.
Once the model has it base color its time to flesh out the rest of the details
Here are some WIP pics with the colors used below:


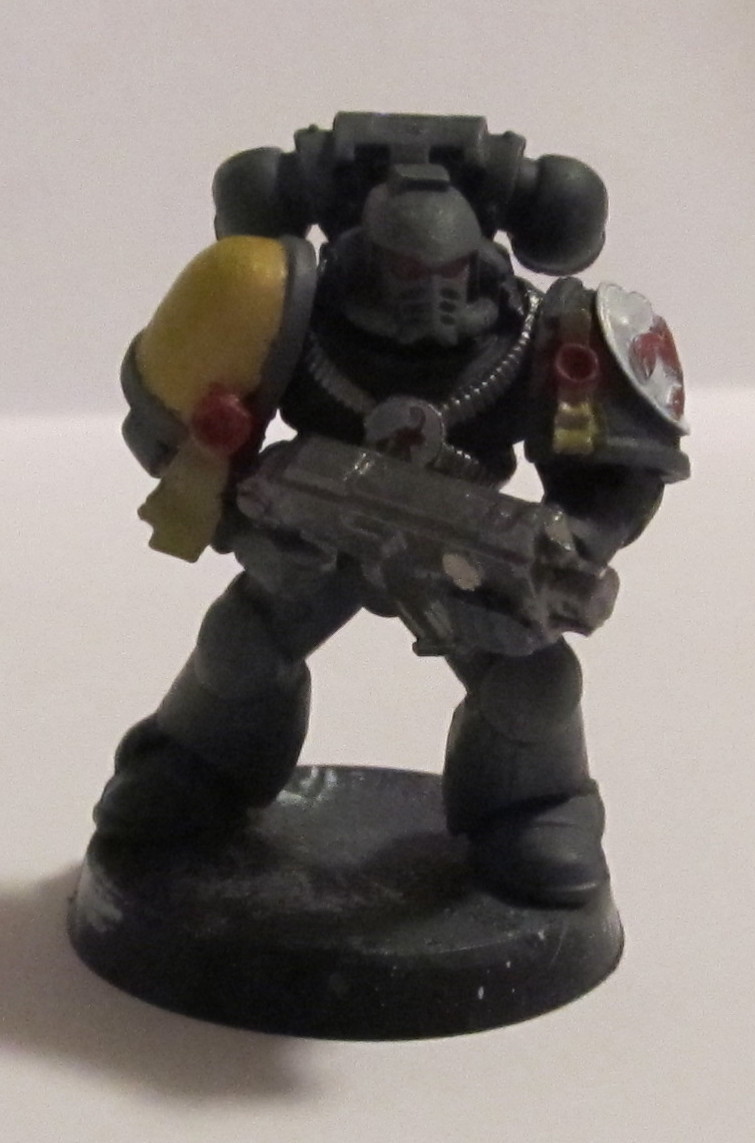
Weapons & Bandoliers (but not the blades and hammers on power weapons) Boltgun metal (Citadel)
Circle of the Red Scorpion Symbol Skull White
Any Skulls, Bones, & Crux Terminatus Bone white
Actual Scorpions, Eyes, Targeters, and purity seals Mechrite Red (Foundation)
Yellows Iyanden Darksun(Foundation)
Any leather Beasty Brown
Any Name banners & ribbons Desert Yellow
Cables and wires, Night Blue
Power Weapons and Claws Just Pick a Blue or a Green that fits your style
Grenades Sick Green
At this stage thin coats are still appropriate and with a dark base coat of Adeptus Battle Grey the yellows and the whites will take at least 2 coats. We will hold off on fixing any "happy little accidents" (RIP Mr. Ross) until we have all of our details painted
**This is to save time and for no other reason. So if your CDO (Which is OCD in alphabetical order) and it drives you crazy not to fix something, by all means fix it.
On to the Dry Brushing/Highlighting. This is where we touch up messes.
** Dry brushing is a technique where you take a paint color a shade or 2 lighter than your base color and paint that onto only raised surfaces of the model. How it works: You dip your brush in the color and then proceed to wipe this paint off onto a piece of paper or paper towel. You want to wipe until you can barely see any paint coming off the brush to the paper. Then quickly but gently brush your model trying to focus just on the raised edges and details. Ideally, you wont paint on any of the flat surfaces and just detail out the raised areas. The advantage to doing this prior to washing is small mistakes get "washed out". This disadvantage is the Highlighting and dry brushing look less dramatic. So you have your recesses covered by the wash, your base colors in the middle, and lastly the dry brushing highlighting on top. This will give your models a depth that is easy to produce without much skill. It just takes some practice

Adeptus Battle Grey gets brushed Cold Grey. I go heavy on the Helmet, feet, Knees, & hands. After the dry brushing I go back and actually highlight these areas in spots to further bring out the detail. If you want to really make them stand out go one shade lighter than Cold Grey on your highlights.

If you make some mistakes at this point just clean them up as they occur. This is a guide to get your models looking good on the table, not win a Painting competitions.
** I think my minis looks great on the table, and my mistakes will only be seen if some one picks it up and looks for them.I tried to find a good balance between time investment & quality of the paint job. I struck a balance that I am happy with. Feel free to adjust to your taste. I also personally do not like the 'eavy Metal Style for every highlight on the model. I want the highlighting to be 'eavy enough to show detail, but subtle enough its not silly looking. Ok rant off and on to the painting.

The purity seal ribbons gets highlighted Kaki on any curves and edges. Once this dries just add some scribbles with a .005 Micron Pen you can find at any hobby store.The edges of the red "Wax" part of the purity seals get highlighted bloody red
Highlight the upside down "V" under the chin, up the "nose" ridge, and across the very top of the
"eyebrow" area on the Helmet of Power Armor. Almost every edge on a Termie Face.


Everything painted Bolt gun metal get washed RED first, and yellow Aquillas on Metallic weapons also get washed red. Don't go crazy you just want to tint it red.

Wash Skulls, Leather, and Dark Flesh tones Brown.
Let the brown washes dry before washing the whole model Black.Water down your black wash so it sinks down into the cracks but wont cover up your other washes. If the wash pools too much, just dry off your brush and soak it back up. Watch the Skull white/Bone White areas. The Black wash will really add tons of detail to your model and blend the dry brushing and highlights together nicely.

**Quick and dirty basing. Go get Sand or tiny tiny gravel from your FLGS or Hobby Shop . Get plain old white Elmer's glue and an old brush. Mix water to glue ratio of about 50-50. Again I never measure but that's about right. Paint the glue to the with the old brush. Dip whole base into the sand/gravel. Take the model out and gently shake off excess. Let dry. Add extra rocks and Grass as you see fit.
Thanks if you made it to the end. Please leave me some comments and let me know what you think of this guide.
9 comments:
Very nice. I know absolutely nothing of painting, so some of the technical terms are lost on me. However, reading this makes me almost think I could paint stuff.
Looking good - what brand of brush-on primer are you using? I tried the Reaper primer and I didn't care for it.
Get a pin vice and drill out the barrels on those bolters! ;-)
Its the White Primer from the Vallejo Game Series.
I'll consider drilling them out.
Awesome Painting guide man :)
Thanks, It was a lot of work and its great to see it well received.
Looks great!
looking good dude!!
what would you recommend get a darker overall grey tone?
@FluffyAwesom Mix a small amount of black into the Adeptus Battlegrey, which should darken it up a lot.
Then drydrush normal Adeptus Battlegrey. After that, pick out a few choice spots to highlight with a lighter grey.
That should give you a darker tone. Just be careful with adding black to a dark grey or you will just end up with black!
@lars4life
thanks a lot!!
Post a Comment