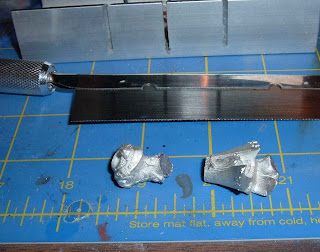
I hated the standard pose of the House Shyeel Artificer but loved the model. So, I did what any sensible person does, I purchased the 20 dollar model and hacked it to pieces with the help of my good friend theleadhead.
Below is the conversation that lead up to me heading over to destroy my perfectly good model.

The leadhead is the red box, I am the blue:
To say the least we are stupid sometimes, but we have alot of fun....
Here is the concept I mocked up in GIMP 2 using the picture from the privateerpress website. We had the tools (well theleadhead had the tools) and the concept so it was just a matter of doing it.

I show up and theleadhead busts out his dremel and jewelers saw. We both agree on a plan of attack; cut twice, measure once, or something like that.
He gets the cut all marked out with the dremel, then takes out his saw and finishes the job.
We are excited at this point because no one lost a finger and the cut happened according to plan.
I drilled out 2 holes on both halves and pinned them together. Theleadhead did some file work to get everything fitting nicely.

We nipped off the base slot because I planned on using one of my resin bases.
Got the pins in the model. I kept them longer than I usually would because I wanted to retain the floating look of the original model.
Lined it up to the base and drilled out some holes.
Bam! It's attached to the base. Now onto greenstuffing the center!
Below are some rough pics I snapped (in some poor lighting). I even brightened them up in GIMP 2 to get them looking the way I wanted.

Added all the rest of the pieces, except the shoulder pads, and let the greenstuff dry.
It's turning out nicely and just how I pictured it in my head. At this point gluing on the pads and gap filling is all that's left.
Here he is all done. The greenstuff work isn't perfect, but when its all primered up none of the flaws should be apparent.
This was stretching my abilities with sculpting tools much like Rahn stretched my painting abilities. I have a lot of room for improvement, but am not in anyway disappointed.
The next step is painting him up but that's for another post. Feel free to comment and let me know what you think. Also you can follow me on twitter HERE


1 comments:
All that work so he has less of a hunchback?
Post a Comment